AO1
Develop ideas through sustained and focused investigations informed by contextual and other sources, demonstrating analytical and critical understanding
ARTIST RESEARCH
|
DAVID BENOLIEL
David Benoliel is a fashion, beauty and portrait photographer. he is well known for editing his pictures and manipulating his images. his work is published in many magazines |
|


|
the subject of the photograph is the woman. the photographer has positioned her is the centre making her the main focus of the viewers attention. the image contains bold colours, the most evident colour being red. the white hair makes the colour red stand out even more, the theme of this photograph could possibly be beauty. the photographer has filled the frame. there are no shadows in the image suggesting that the image was well lit.
|

|
|
I find this image interesting because of the use of colour, the photographer has used two colours that compliment each other but the white seems to be more dominant than the red, the connotations of the colour white are innocence and perhaps purity which are contrasting to the connotions of the colour red which include danger. the photographer has filled the frame with the subject. the subject is a woman who has been painted white, she is smoking. the photograph seems to have been taken inside with controlled lighting
|

|
|
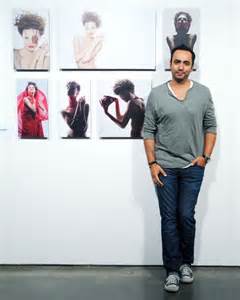
JORGE MIGUEL Miguel is a Spanish photographer, he became an amateur photographer at the age of 14 and considers himself to be entirely 'self taught'. His work is showcased in many galleries and is also published on his website. he recently completed body of work that i am particularly interested in titled 'DE CABEZA' which translates to 'headache' |
|


|
this is a photograph of a woman who is covered in flowers, she has been painted green and she is wearing a pink wig. perhaps the picture represents nature because of the use of green and the use of the flowers. green seems to be the dominant colour in this image, the colours used are bold and vibrant giving the image a happier mood. this image has been pre planned and was taken inside, the photographer might have used butterfly lighting in this image as there is a 'butterfly' like shadow under the subjects nose indicating that the light must have been above the subjects head.
|

|
|
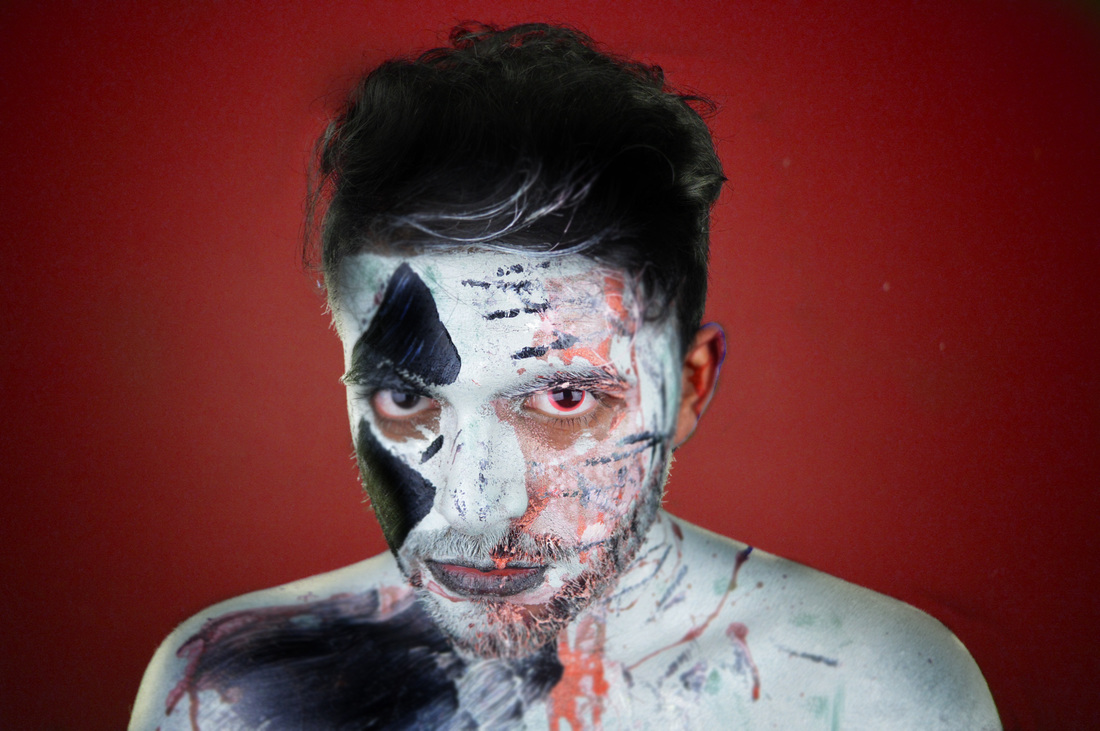
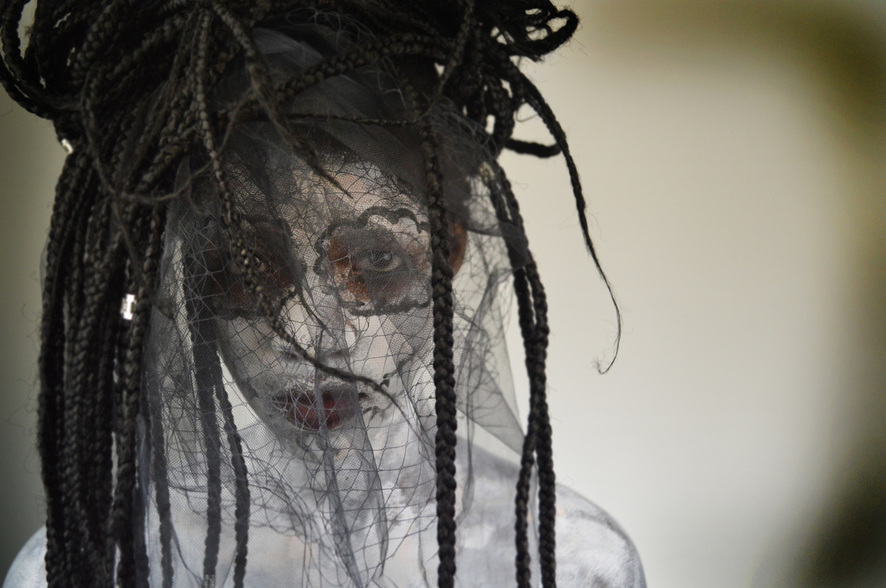
this is an image of a woman with chains around her eyes and she is bleeding from her eyes. the application of make up in this image is rather flawless, the colours used seem to be dull colours like grey and white which give the image a darker atmosphere. this is a rather grim image which i found intriguing. the first thing that came to mind when i saw this was 'see no evil' from the three wise monkeys
|

|
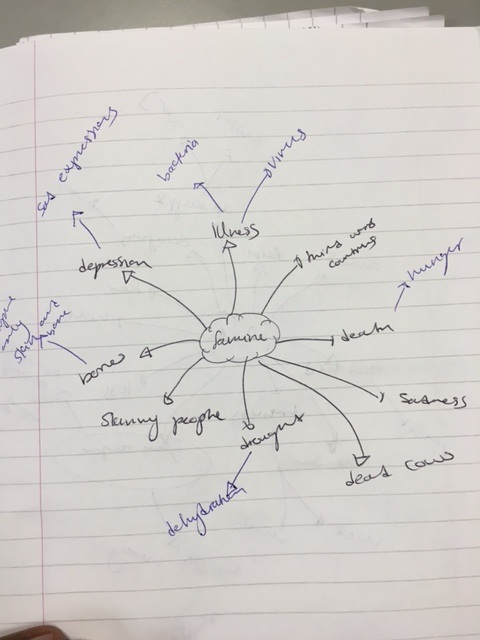
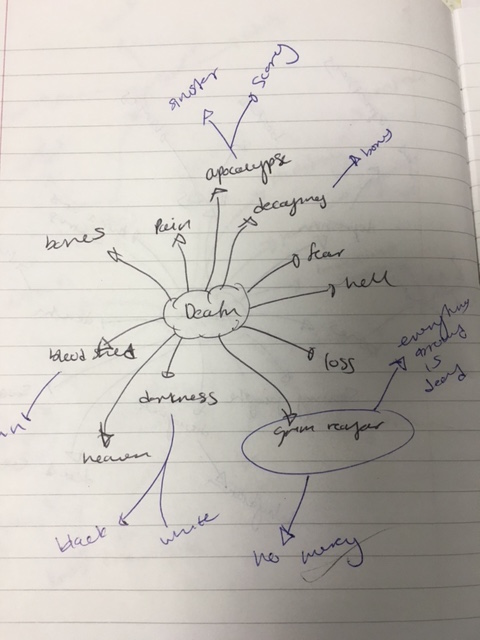
THEME BRAINSTORM

THE FOUR HORSEMEN
PESTILENCE
|
WAR
|
FAMINE |
DEATH |
|
|
MOODBOARD


AO2
Explore and select appropriate resources, media, materials, techniques and processes, reviewing and refining ideas as work develops
LIGHTING
|
HARD LIGHT
hard light is usually used to create contrast between shadows and highlights. it is very dramatic and could be considered harsh and not easy on the eyes . to achieve hard light the use of a smaller light source would be appropriate. the smaller the light source the harder the light and the more the face is split into areas of light and darkness. |
SOFT LIGHT
with soft light there is less contrast between light and dark. it gives the skin an appealing finish, making it look almost airbrushed. this is achieved through the use of a large light source |
USING ONE LIGHT SOURCE
BUTTERFLY LIGHTING
this is a flattering style of lighting that makes the subject appear powerful. this is usually used by magazines. the camera is positioned in the middle and the light is raised at a 45 degree angle
this is a flattering style of lighting that makes the subject appear powerful. this is usually used by magazines. the camera is positioned in the middle and the light is raised at a 45 degree angle
REMBRANT LIGHTING
this is a style of lighting that makes the face appear slimmer. it is flattering, dramatic and mystical. it covers the face is areas of shadows. it is achieved by placing the light source 35 degrees to the side of the subject and 45 degrees high
this is a style of lighting that makes the face appear slimmer. it is flattering, dramatic and mystical. it covers the face is areas of shadows. it is achieved by placing the light source 35 degrees to the side of the subject and 45 degrees high
SPLIT LIGHTING
this is a very dramatic style of lighting where by half the face is lit and half is in darkness. the light source should be places close and to the side of the subject. and it should also be in line with the subjects head
this is a very dramatic style of lighting where by half the face is lit and half is in darkness. the light source should be places close and to the side of the subject. and it should also be in line with the subjects head
USING TWO LIGHT SOURCES
CLAMSHELL LIGHTING
This is a flattering type of lighting achieved by using two large soft lights. The lights should be positioned near the subject. The main light should be positioned the same as butterfly lighting and the second light should be directly underneath. The camera should be positioned in-between the two lights and at the same level as the subjects head. if the two lights are of unequal size then the larger light should always be above.
This is a flattering type of lighting achieved by using two large soft lights. The lights should be positioned near the subject. The main light should be positioned the same as butterfly lighting and the second light should be directly underneath. The camera should be positioned in-between the two lights and at the same level as the subjects head. if the two lights are of unequal size then the larger light should always be above.
RIVER COP LIGHTING
this type of lighting is used to make the subject appear suspicious, scary and or mysterious. to achieve this use two equal sized bright lights , place one either side of the subject (slightly behind them). the size of shadow is controlled by how far back the light is placed. the further back the bigger the shadows.
this type of lighting is used to make the subject appear suspicious, scary and or mysterious. to achieve this use two equal sized bright lights , place one either side of the subject (slightly behind them). the size of shadow is controlled by how far back the light is placed. the further back the bigger the shadows.
SPRAY LIGHTING
spray lighting is used to make the background seem more interesting and makes the subject stand out. the light should be positioned behind the subject facing the background. it can be combined with any other type of lighting and it helps separate the subject from the background.
spray lighting is used to make the background seem more interesting and makes the subject stand out. the light should be positioned behind the subject facing the background. it can be combined with any other type of lighting and it helps separate the subject from the background.
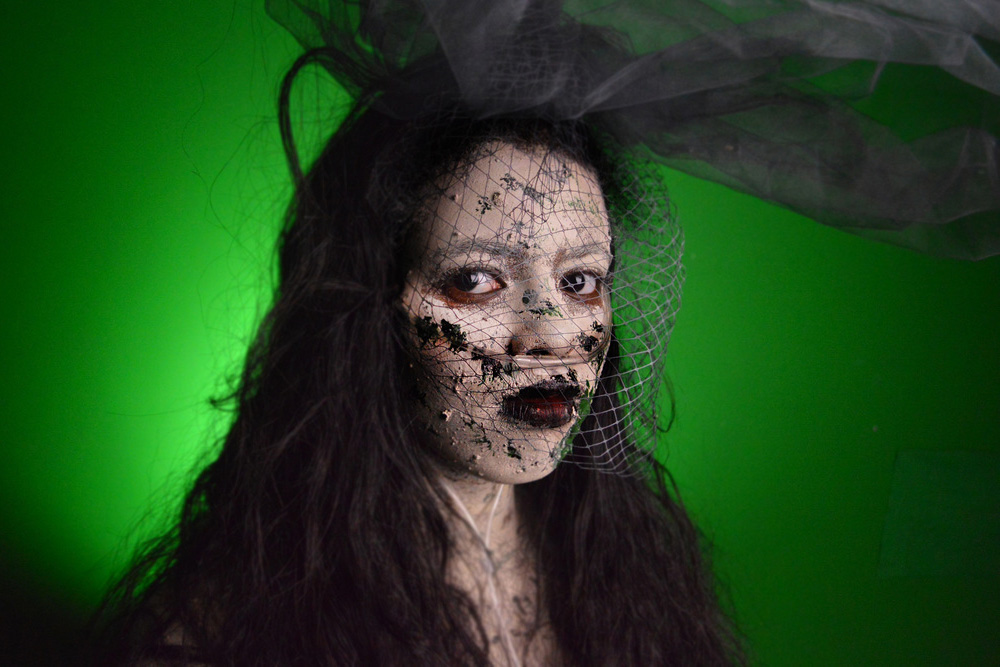
ARTIST REPLICATION (Jorge Miguel)

|

|

|

|
PHOTOSHOOT ONE
PHOTOSHOOT THREE |
PHOTOSHOOT TWOPHOTOSHOOT FOUR |
THE OBJECTIVES OF PHOTOSHOOTS 1,2,3 AND 4 WERE TO PRACTICE MAKE UP AND LIGHTING FOR EACH OF MY FINAL PIECES
AO3
Record ideas, observations and insight relevant to intentions, reflecting critically on work and progress
PHOTOSHOOT FIVE
OBJECTIVE: SHOOT TOWARDS FINAL PIECE (PESTILANCE)
PHOTOSHOOT SIX
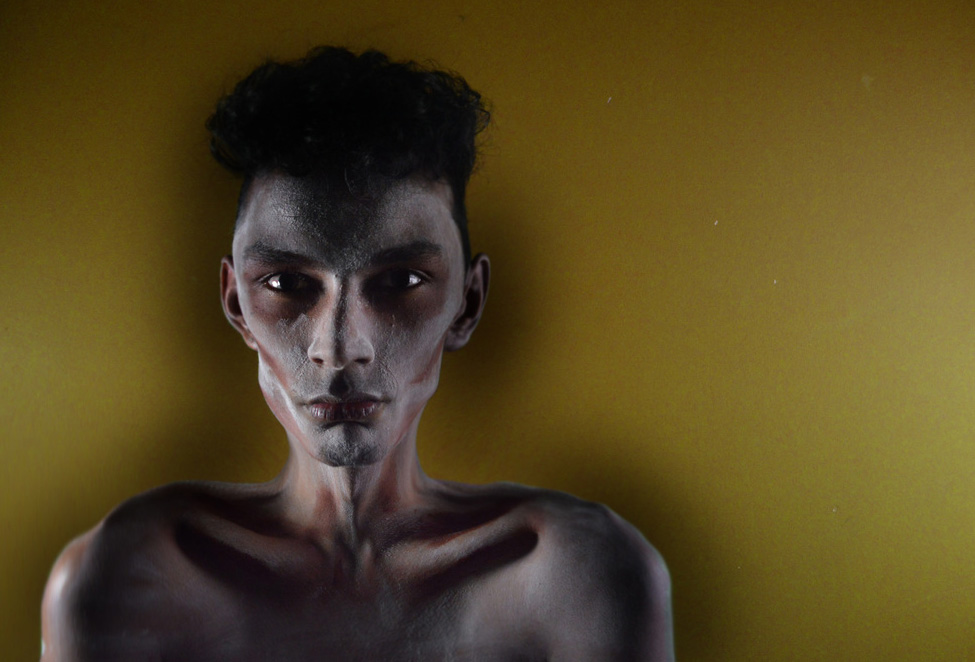
OBJECTIVE: SHOOT TOWARDS FINAL PIECE (DEATH)
PHOTOSHOOT SEVEN
OBJECTIVE: SHOOT TOWARDS FINAL PIECE (FAMINE)
PHOTOSHOOT EIGHT
OBJECTIVE: SHOOT TOWARDS FINAL PIECE (WAR)
The outcome of photo shoots 5,6,7 and 8 was very dependant on my application of make up. it was easier to apply make up for pestilence and death and make it look effective, however, i found it difficult at first to use make up in the portrayal of famine, this is the final piece photo shoot that look me the longest to achieve because it was difficult to achieve the contours using acrylic paint, i then switched to using flour instead and i was able to complete a photo-shoot for famine worthy of a final piece
EDITING ON PHOTOSHOP
CHANGING BACKGROUND IN PHOTOSHOP
OPTION ONE
STEP 1: Open image in photoshop and duplicate the background layer
STEP 2: Go to 'image', 'adjustments' and select 'Hue saturation'
STEP 3: Drag the 'hue' bar' to preferred colour
STEP 4: Drag the original layer above and using the eraser tool, erase the backgroung
STEP 2: Go to 'image', 'adjustments' and select 'Hue saturation'
STEP 3: Drag the 'hue' bar' to preferred colour
STEP 4: Drag the original layer above and using the eraser tool, erase the backgroung
OPTION TWO
STEP 1: Duplicate the background layer
STEP 2: Go to 'image', 'adjustments' and select 'replace colour
STEP 3: Select the colour green
STEP 4: Drag the fuzziness up to make the colour selection broader
STEP 5: Drag the hue to preferred colour
STEP 2: Go to 'image', 'adjustments' and select 'replace colour
STEP 3: Select the colour green
STEP 4: Drag the fuzziness up to make the colour selection broader
STEP 5: Drag the hue to preferred colour


|
when editing 'famine' i used the liquifying tool which is accessed by going to 'filter' then selecting the liquify tool.using this i was able to manipulate the image to make the model appear thinner
|
|
I used the dodge, burn and blur tools to help clean up the images and add some last minute touches
|
AO4
Present a personal and meaningful response that realises intentions and, where appropriate, makes connections between visual and other elements
FAMINE
DEATH
PESTILANCE
WAR